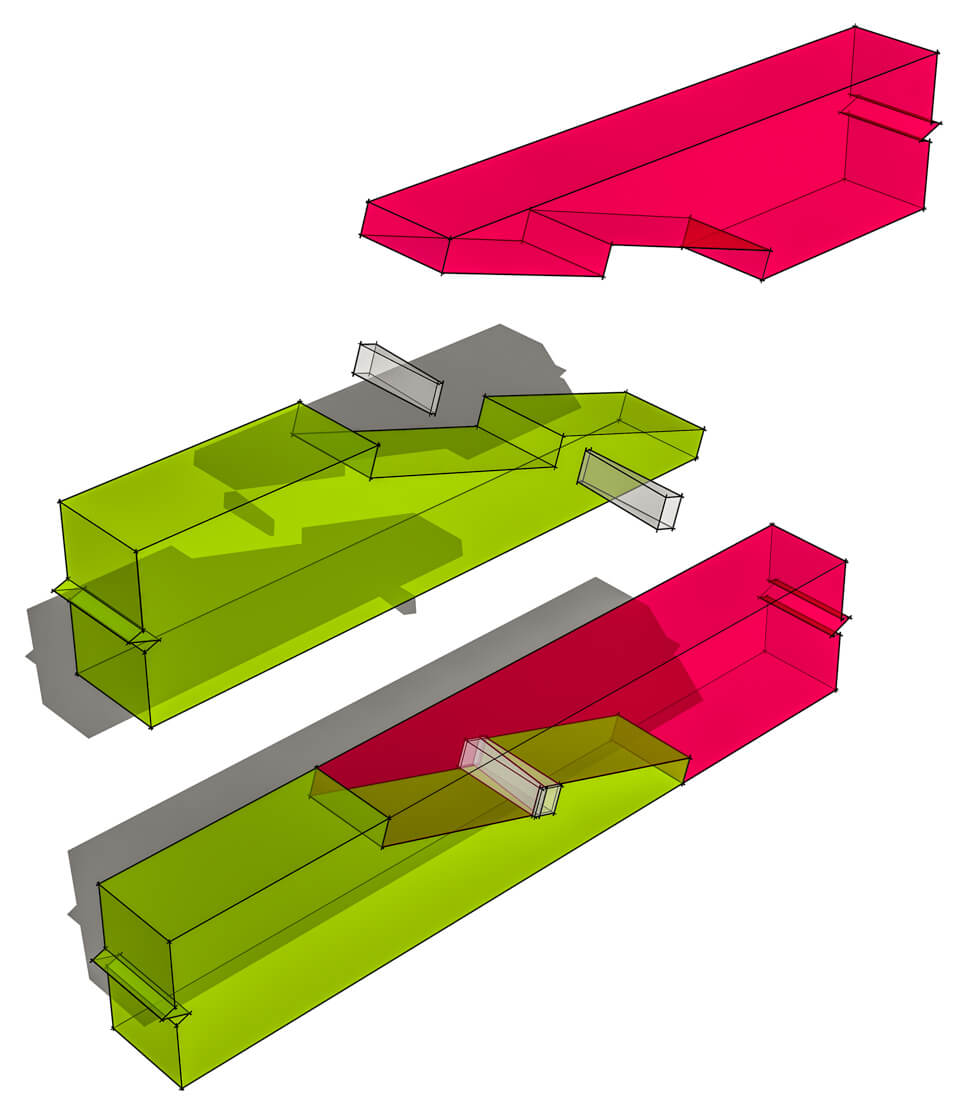
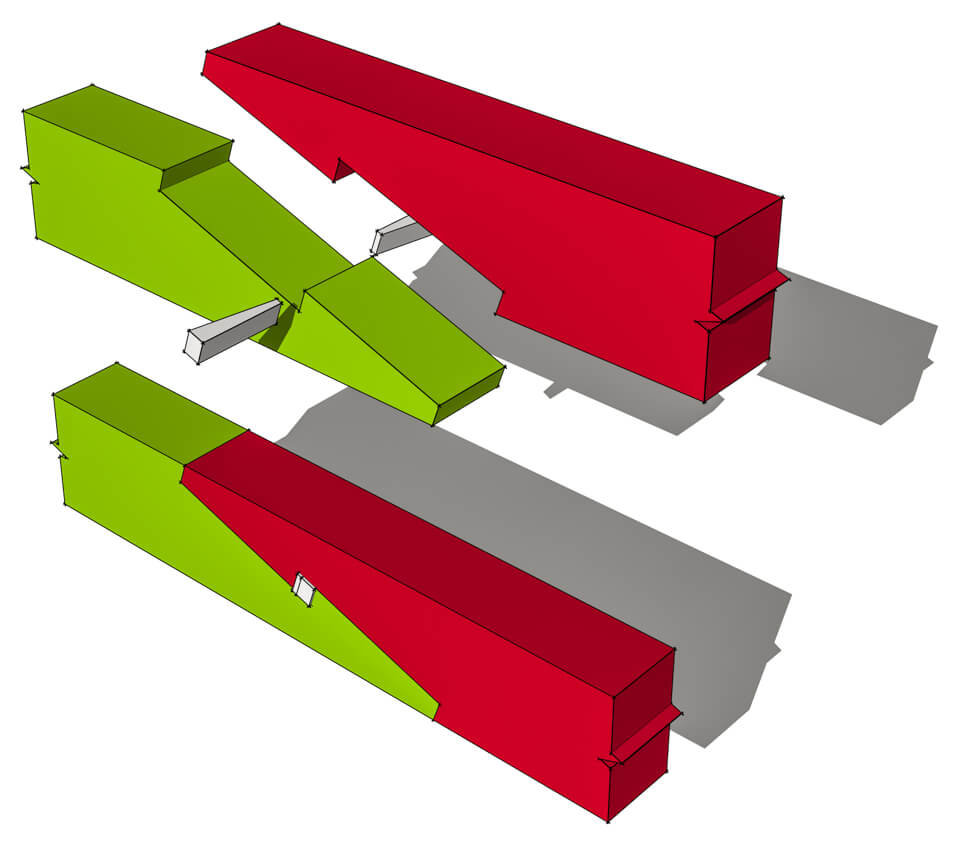
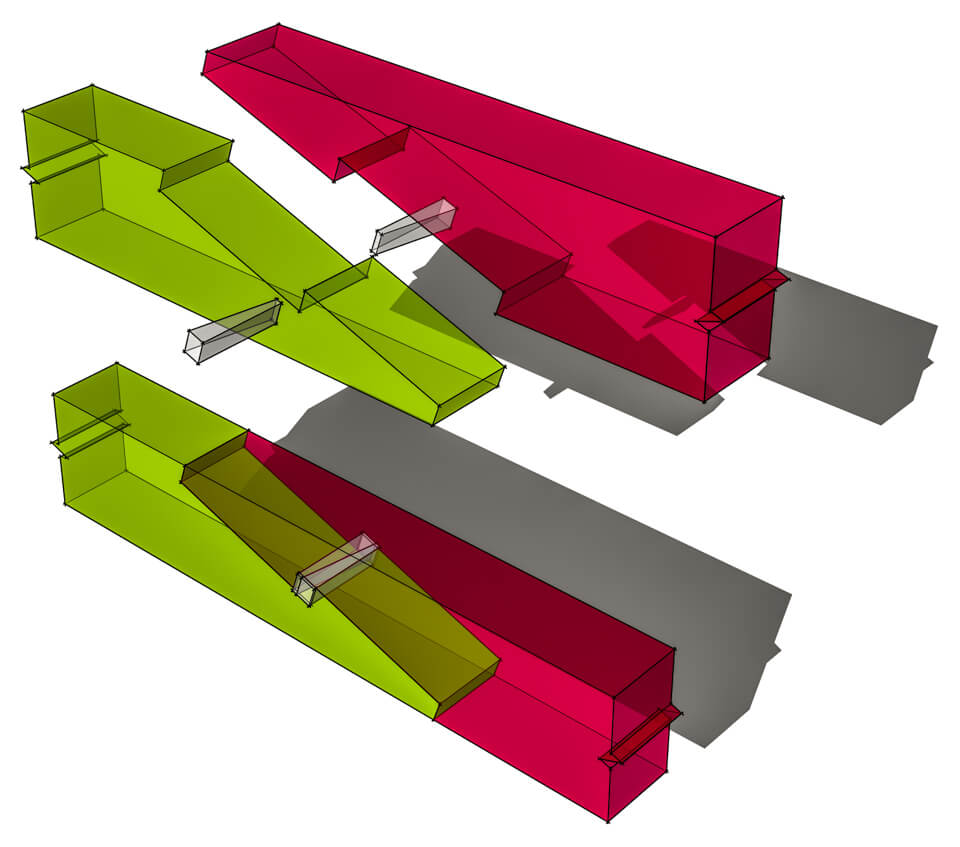
Say that three times fast! This under squinted stop splayed scarf joint with table and wedge is a classic timber framing joint. The complexity adds great strength , and it’s a great looking joint for any frame.
The tables create two levels in the splayed face of the joint. And as the faces interlock, there is a space left where two wedges are inserted to lock the joint into place. Like any other scarf joint, this under squinted stop splayed scarf joint with table and wedge is used to make two timbers act as one unit to span a distance greater than one alone.
Is there a recommended range of slopes for this joint? i.e. for a 12″ (tall) timber, how long should the total scarf be?
I would go with anything over 2′, 3′, to me, looks good.
If this joint is between two posts with braces, where is the best spot for the joint to occur? Over the brace with a full tenon not interfering with the table and wedges or just past the brace tenon floating in between the two posts? Curious about the best placement? Thanks.
I tried this out once with Douglass fir and the joint failed in two places, one at the wedge location and the other at the undercut. It was probably my lack of craftsmanship or my kiln dried wood. I was joining 2 4×6 pieces and stood on them in the middle as a test. I was bummed but learned something. I’m thinking that one of the other joints would have been a better choice for a newbie like myself.
Thanks for the cautionary tale!
What is the best way to cut this joint?
I would make a template to lay out the scarf joint. Then use a 10″ saw to cut the joint from each side, and then clean it up with a chisel to create a hollowed out space so only the joint edges touch.
I disagree with the geometry of the end of each piece of this joint. The end angle must be fairly acute (around 60 deg) to maximise resistance to bending moment.
If it’s square or indeed obtuse the scarf is not locked in. It’s an easy addition to this scarf and makes it considerably stronger.
This is how to lay one out correctly in my opinion https://www.youtube.com/watch?v=p7K6m6cH7os
Thanks for your thoughts and resource!
I am repairing and replacing timbers in a 200 year old frame and have used a stop splayed scarf joint for post repair. I need to replace the two 31 foot 5”x6” plates and hope to join three shorter pieces together. The Under Squinted Stop Splayed Scarf Joint With Table and Wedge seems a strong choice but my timber framer says it’s too complicated for our rough timbers. She recommends a half and bridled scarf joint. Do you agree the simpler joint would be good enough?
Simple in your case is a great way to go.