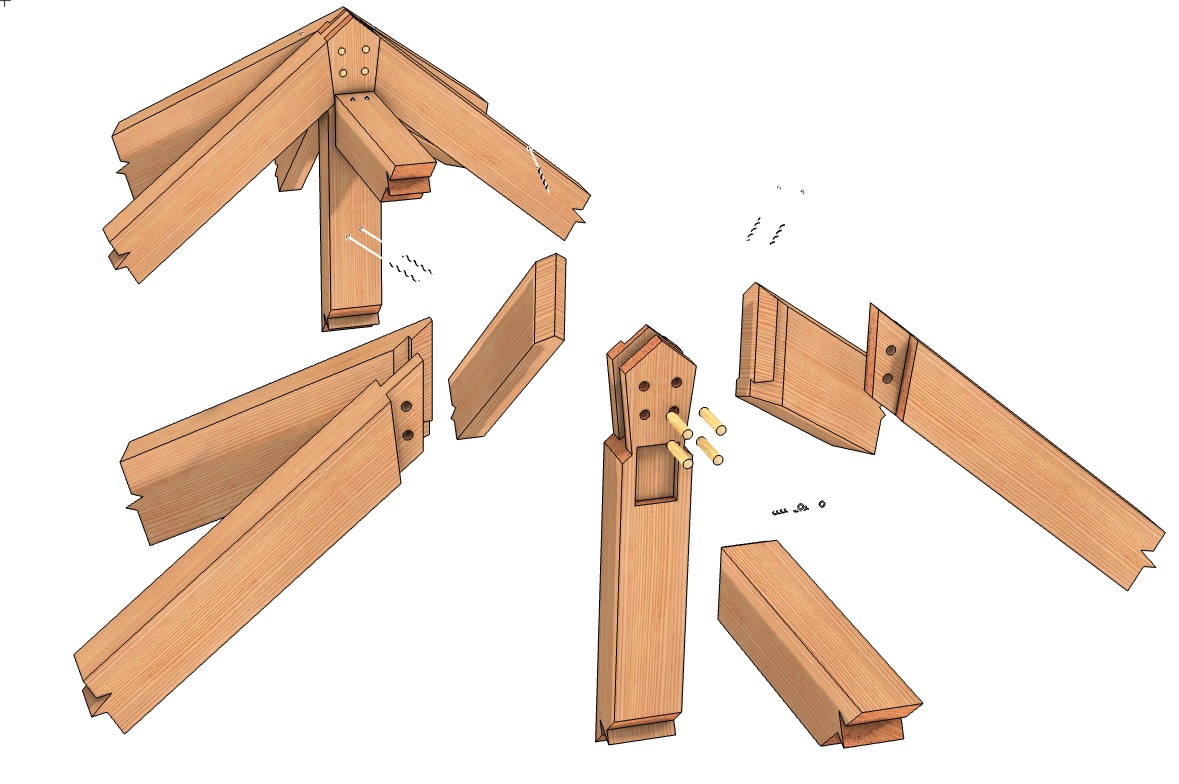
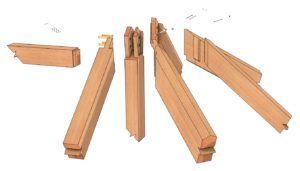
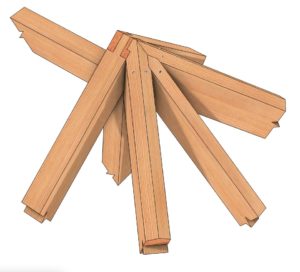
Let us show you some intricate work with this hipped pavilion joinery detail. When three roof planes come together, it makes for some complex cutting. This type of roof shape is best for timber framers with some experience. You can see this detail utilized in our 16x24 Hipped Roof Pavilion.
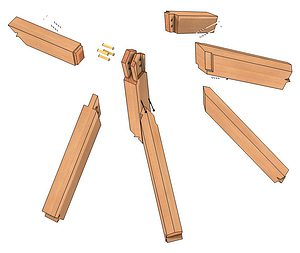
There is a bevel cut into the top side of the hip rafters to form the roofline where the planes intersect. The rafters also have a uniquely shaped tenon that allows two hip rafters to be seated together into the haunched king post. A diagonal housing is cut into them to accept the jack rafters. Structural screws inserted from the top of the beam secure them to the king post.
The principal rafters connect from the king post to the plate on the adjacent plane of the roof. They have a relatively standard tenon that will insert into the mortise on the king post. The challenge with this tenon is that it is cut on the diagonal to match the pitch of the roof.
The jack rafter shown in this detail is wedged between the two hip rafters. Instead of a tenon, the end of the jack rafter is cut on a diagonal. It is seated into the housings cut into the hip rafters and secured with structural screws placed at the top of the beam.
There is some serious cutting happening in the king post! It has to accept the hip rafters, principal rafters and the ridge beam. So it has a through mortise cut into it to accept the principal rafter tenons, which are secured with hardwood pegs. It also has a housing for the hip rafters, and further down there is a housing to accept the ridge beam.
You can be proud of your accomplishment when you successfully cut this hipped pavilion joinery!
I m a retired builder and carpenter. I ‘ve never done any timber framing, but have been involved with dismantling 2 post and beam barns, and am familiar with framing hip roofs. This joint has as many mental steps as actual laying out, measuring, sketching before the cutting starts. If I were to do this, I would have started with a few pieces of 4 x 6, 2 feet long , and a couple of extra pieces, on my workbench. If nothing else, it is an interesting puzzle. It will be an easier challeng doing sitting down and wasting less wood.