What is above form is called Tao; what is within formis called tool. — I Ching
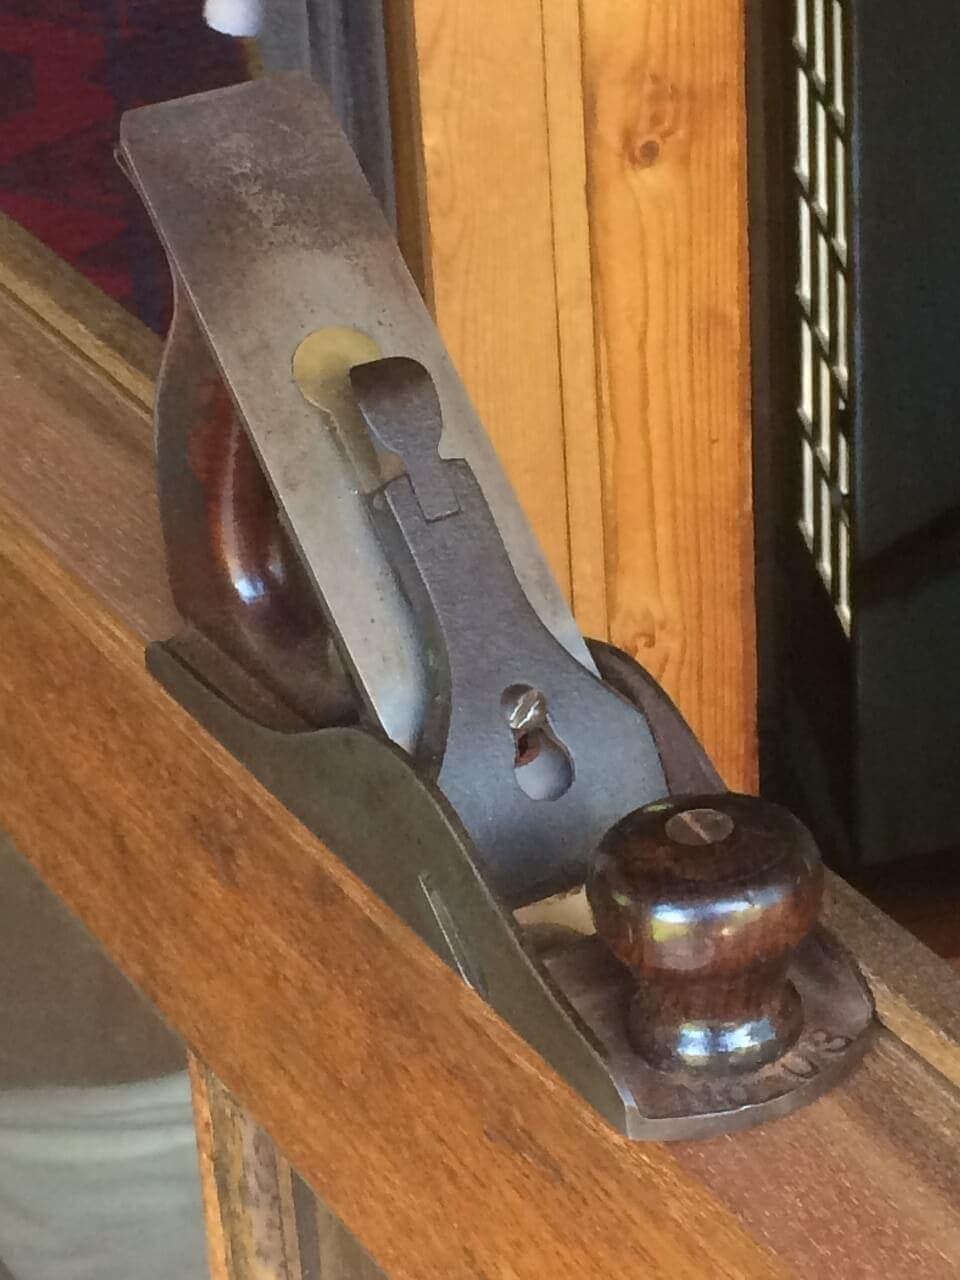 The plane in the photo started as a rather common #3 smoother. With a bit of drilling, sawing, grinding and filing, I transformed it into a rabbet plane, and it is still the one that I reach for. Call it a #3 –10 1/2.
The tools of the trade that have evolved for working wood all derive from the simplest forms: axe, adze, chisel. Within those forms, much variation exists. In terms of function, they may be divided into carving tools and joinery tools. Function is determined by form.
Enter the three-curved edge. A woodcarver shapes his chisels and gouges so that they are curved in section, profile and plan, with the corners rounded. Interestingly, the tools used for timber conversion, broadax, adze, and slick have the same three-curved characteristic…as do the drawknife, and its Japanese cousin, the yarri-kanna or spear plane.
Joiner’s chisels are typically straight and flat along the back, with a square edge and firm corners. The Japanese slick is a large joiner’s chisel, primarily used to shave tenons, or for the tabling of scarf joints.
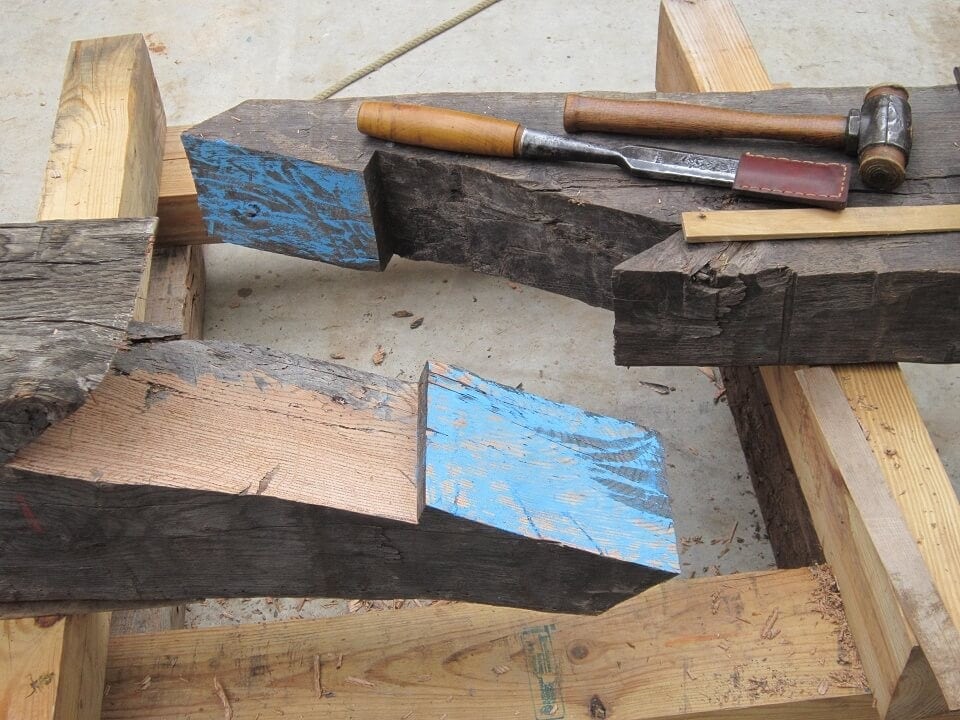
If you are contemplating cutting a timber frame, you will want at least one heavy framing chisel. A new chisel is going to be geometrically precise, and sharp enough to cut wood right off the rack. Japanese chisels are laminated, as are older English and American chisels. Except for those made especially for timber framing, Japanese tools are in metric widths and will not gauge a mortice, if you lay out with a framing square. New Sorby chisels are quite acceptable, although that tang arrangement may give you a blood blister from time to time. Barr makes excellent tools, with somewhat ordinary handles.
Older chisels are likely to require some work. Any tool that has “CAST STEEL and/or WARRANTED” stamped into it was made roughly between 1750 and 1900, beginning in England with Huntsman’s development of crucible steel and the Sheffield manufactories, and continuing in American tool making through the 19th century. There’s a whole list of names…Butcher, Buck, Barton, Underhill, White made quality tools, as well as some fine but obscure makers. By comparison, there are very few German, French, Dutch, or Swedish tools in the antiques market, although all those countries made fine tools as well.
 The plane in the photo started as a rather common #3 smoother. With a bit of drilling, sawing, grinding and filing, I transformed it into a rabbet plane, and it is still the one that I reach for. Call it a #3 –10 1/2.
A good framing chisel will be 14-16 inches long, with a blade eight inches or so, at least a quarter-inch thick, with some beveling of the edges or a rounded or peaked top side. Sockets are preferable to tangs, the handle is easily replaced and there’s nothing to pinch your hands when working a deep mortice. Most of the tool will be iron, with a steel bit about 1/8″ thick laid (forge-welded) onto the back. The back need only be flat for a couple inches, and a slight curve can be an advantage. Trying to straighten that curve, it is possible to grind through the steel completely, rendering the tool worthless (experience…).
A steel ring will keep the handle from splitting. It will also very quickly leave a nasty blister in the palm of your hand if you spend any time pushing the chisel, pointing pegs for instance. Rounding the end of the handle to a dome shape, so that the impact is on the center rather than the edge makes it much more comfortable, and whacking with a rawhide mallet isn’t as damaging as using a steel hammer. Driving a 1/2 inch chisel that is moving wood is preferable to pounding a larger chisel that isn’t. The shock of impact, if it isn’t absorbed by the wood, will eventuallydamage something. The effect on chisel handles, mallet heads and handles, is repairable… injuries to tendons and cartilage can be debilitating.
Scribing gouge: a chisel with a slightly rounded back in section, ground in-cannel. I came across this tool quite by accident, trying to achieve the rippled effect produced by a Japanese spear plane. While it didn’t work for that, the scribing gouge is quicker than a scrub plane for setting bearings for square rule, or plumb-line, layout. For wasting wood cross-grain, tenon cheeks for example, I have found nothing that works better. Ground to a bull-nose profile, it can be sharpened just like a chisel, no mucking about with slip-stones.
A tenon gauge is easily made with two small (8″ x 12″) framing squares, and a pair of stair gauges. Planing up to a shoulder, a Stanley (or a Lie-Nielsen, if you prefer) #10 or #10 1/2 rabbet plane is just the ticket.
Morticing is generally a process of cutting a rectangular hole by removing the waste with an auger, and then chiseling the corners square. Old-fashioned T-augers are still common and inexpensive in the antiques market, and they still do exactly what they did a century ago. If you want that boring to go a bit faster, add another pair of hands, or find a boring machine. If you still have that other pair of hands, a corner chisel and a heavy maul will make quick work of squaring the corners.
Obviously, there are power tools. They are arguably faster, louder, and can cost as much money as you are willing to spend. A 1/2″ electric drill is a useful tool, one with a slip-clutch is safer. Forstner bits are good for shallow mortices and housings, but they won’t clear chips in a deep hole. Wood Owl makes the best auger bits I’ve ever used. Period.
It’s hard to beat a Skil Worm-Drive saw for cutting and kerfing. If you can find an old one-man crosscut saw, it will track perfectly in the groove left by a thin-kerf blade. Japanese blades…I’m working with a Turbo-Cut frame saw blade from Highland Hardware, cuts so fast you actually have to hold it back! If you want to employ that other set of hands, this is a tool to consider.
Planing surfaces. For years, I skipped past the old coffin-sided wooden smoothers, thinking the Stanley type planes were more advanced. More the fool me. The old ones have laminated steel blades, like the framing chisels, and the body can be repaired or replaced. Grind a crown in the blade, shape the sole to a curve crosswise and lengthwise, fit a throat piece of boxwood or brass or ebony, and you have a “scudding plane“. In between the wooden-bodied smoother and the Stanley are the transitional planes, with the same adjustments topside as their iron counterparts but the advantages of a wooden sole that can be shaped to suit, and it has a lot less friction. Brush on some raw linseed oil thinned with turps, and make shavings!
Most of the true cedars are relatively straight- grained, and respond well to hand-planing, as will the commercial conifers … Douglas fir, bald cypress, Southern yellow pine, Eastern white pine… Eastern red cedar (juniperus virginianus) is exceptionally difficult to finish with a hand plane. It tends to be brash and brittle, with numerous knots and changes in grain direction. It is also widely available, cheap, dimensionally stable, highlyresistant to rot, and takes a fine polish. The spear plane, if you can master it, will create a smooth, tactile surface, on this wood or any other.
No tools will make a man a skilled workman who has not learned how to use them, and has never bestowed any attention on them…The tools which would teach men their own use would be beyond price. — Socrates
https://timberframehq.com/author/michael-langford/
Has nobody read this yet or nobody use this resource for ideas and inspiration? This is wonderful and personal information -and as a timber frame noob/wannabe, this is gold. Makes me want more things, however, as I have enough to make something but have never had a slick, and thus article makes you want one so bad! Anywho, from my limited experience, personally building a small wobbly 6- post structure, I know that poor tools and weak skills can still make the job happen, with successful elements of style and maybe making the basic requirements, like not collapsing, you know? Rustic and fine tools must be so satisfying to mix with practiced skills. Sigh, we all get where we’re meant to be, lol. My current timber joint is a Japanese style gate, using junk cedar and larch I had. Using twisted wood is hard, but I enjoy the thrift of it, and need that or the project can’t happen. I also like the Japanese sentiment (usually applied to fixing broken pottery), their belief that some things don’t diminish if broken, and are simply waiting to be remade and used again.
Live large, wood people, but be safe
Zyoji
Is anybody out there…
“Is anybody out there…”
I certainly hope so. It only takes a few skilled people with a handful of tools to have an effect on how we build things. Work with the “crooked timber of humanity”… gates and garden sheds everywhere, plane shavings so the birds can build nests.
Yes, we are out here. I enjoyed this article very much. I’m new to Timber framing myself. I took it up as a hobby upon my retirement, and I learn everyday from everybody’s generous sharing of their knowledge. Many thanks.
We’d july 5. 2023. Read your article while taking a bread from trimming out custom closet interiors. I’m retired from the construction industry, trained and worked as a carpenter while getting an architectural engineering education. I recently learned of the organization Charpentiers sans Frontiers. I’d like to work with them so I’m trying to get familiar with and educate myself about timber framing. I just read your info twice. It is very informative and led me deeper into addition sources of knowledge. Many thanks for taking the time to explain
Thank you for your comments! Good luck on your framing journey.