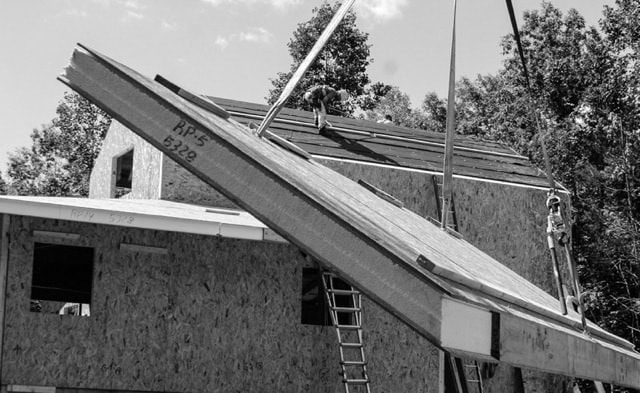
After the frame is up, you are going to have to enclose it and there are quite a few different paths that you can choose. In building a timber frame enclosure system, a couple of overriding considerations need to be taken into account, as well as the details about each system. This will affect your budget and you need to understand the options to make the best decision for your project.
Structural Insulated Panels (SIPs)
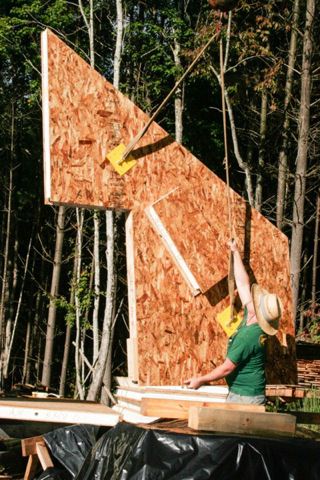
Structural insulated panels, or SIPs, have been around since the 1970s and have been growing in popularity ever since. They are basically a 1/2” layer of OSB, a layer of foam, which varies in thickness depending on your insulation needs, and another layer of ½” OSB. The layers are glued together making them excellent in structural applications such as creating roof over-hangs and shear walls. Your engineer will work with your designer and architect to apply the panels’ structural benefits to the timber frame engineering. They may possibly reduce the need for knee braces and other timbered elements, saving you some money.
These panels are produced off-site and shipped to your site by the manufacturer when you need them. They come in sizes up to 8’ wide by 24’ long with all the angles, windows, and doors openings cut out and ready for installation. They get screwed to your roof and wall timbers. They can be also used in areas that are not timber framed in place of conventionally framed wall and roof systems.
There are several different types of foam, each with different pros and cons with factors like cost and insulation values. Where you live and the local building code requirements for insulation R-value in your walls and roof will affect this decision.
SIP homes also have extremely low levels of air infiltration because there are fewer gaps to seal. This airtight characteristic makes heating and cooling your timber frame home more economical in both your monthly energy bill and the smaller size HVAC units your home requires. Homes built with SIPs are able to keep a consistent temperature and have fewer drafts and less noise infiltration than standard construction buildings. When properly installed, they maintain a higher whole-wall R-value than stud walls of similar proportions.
Types of Foams Used in SIP Panels
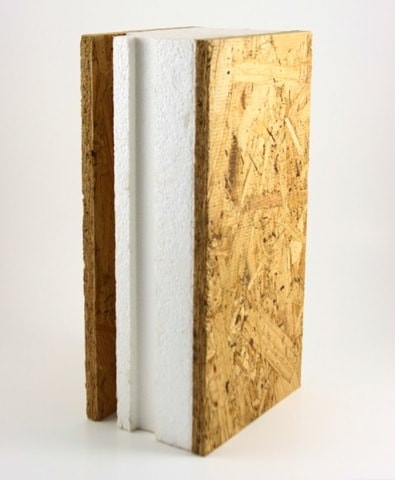
(EPS) 1” of foam = 3.8 R-value
This is by far the most popular type of foam used for SIPs. EPS foam is basically a high grade of Styrofoam. It is extremely stable and has been used in many other applications. It costs the least, but also gives the lowest R-value compared to the other foams, which can mean thicker roof or wall panels. These are easy to modify on site for electrical work and window and door changes.
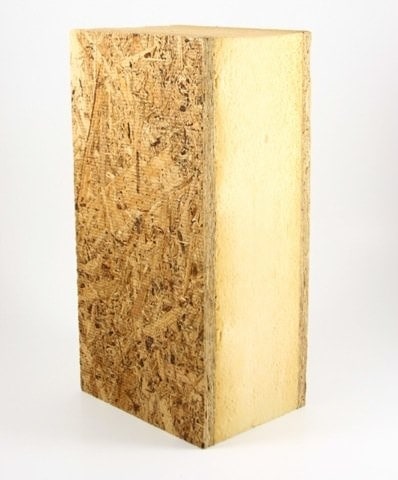
Polyurethane (PUR) - 1” of foam = 5.0 R-value
The second most popular panel is the polyurethane-based panel. It offers a higher R-value per inch, which means that it will cost more than the EPS foam but you may be able to use a thinner panel. The extra cost with a thinner panel can be made up somewhat in window and door jamb extensions, trim details and eave details. One side note is that it is harder to modify these panels on site and your electrical system has to be figured out completely before the panels go into production.
Neopor (NEO) - 1” of foam = 4.5 R-value
This is a newer product that uses graphite to enhance the EPS foam. It gives it a grayish color and you get a better R-value than with standard EPS foam.
Concerned about wiring your electric in SIP's? Check out our article Running Wires in SIPs – Concerns for the Homeowner
Conventional Framing
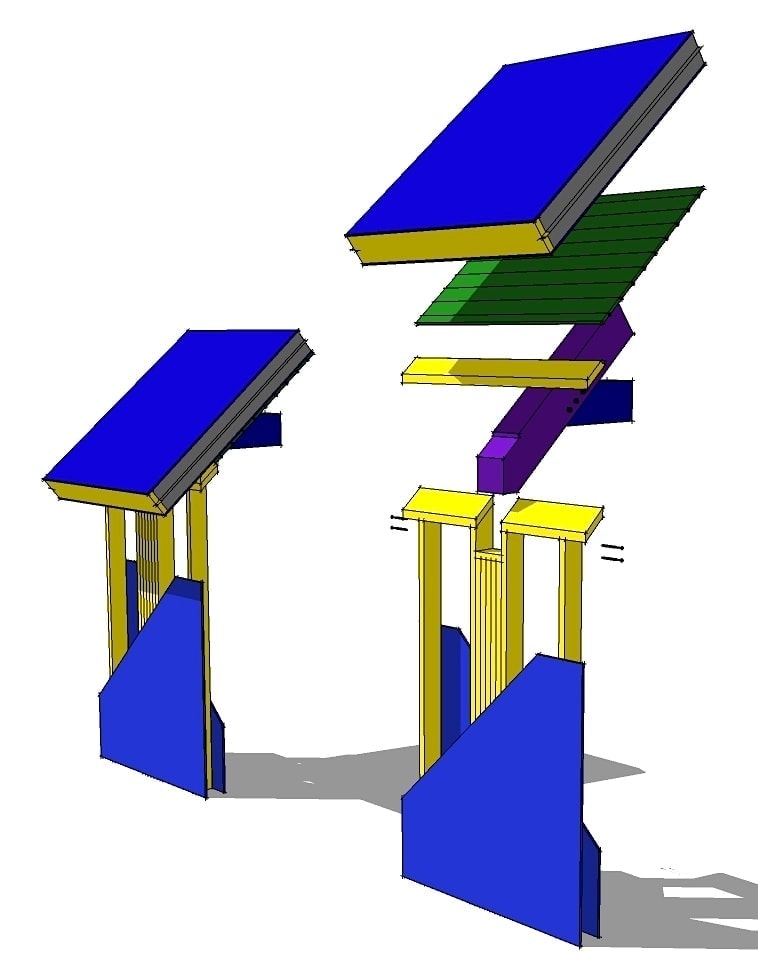
Oddly, conventional framing overtook and made timber framing all but disappear from standard building practices until it was revived in the 1970s. It consists of the standardized 2x4 and 2x6 pieces of lumber for the wall framing and using 2x8, 2x10, 2x12 or pre-made roof trusses out of 2x material to create the roof. This all gets sheathed in a plywood or OSB layer that ties everything together structurally. This method is the way that at least 99% of the homes in this country are built.
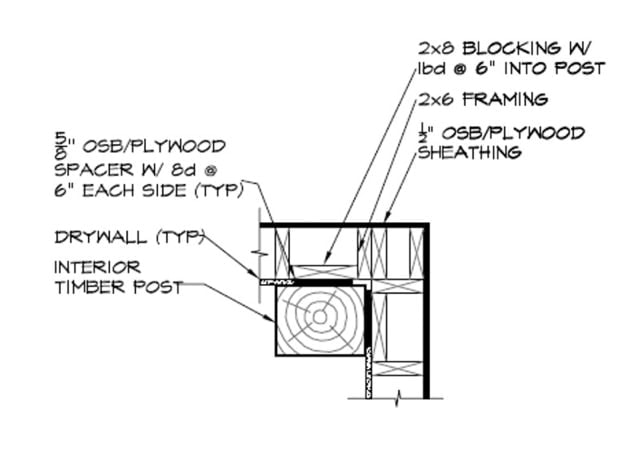
In the case of incorporating them in a timber frame, the walls are constructed and stood up around the timber frame. The walls need to be spaced off the frame to the outside whatever distance the inside finish walls will be. For example, for a ½” drywall finish putting a 5/8” spacer behind the timbers will allow you to slide the drywall behind the post or plates, creating a clean look.
Some folks like to use the infill system, putting the conventional wall inside the timber frame. This is not recommended for exterior walls. As the timbers dry and move through the seasons, you will certainly get air infiltration through the gaps that are created between the walls and timbers. This will increase your energy costs as well as potentially giving you moisture problems in the future.
Electrical wires and insulation work can be completed as usual and you will have the choices of standard insulation types that you can put in the walls. To match the tightness and to get the insulation value of a SIP, you will need to use a spray-in polyurethane-based foam for your walls and your roof. After all factors are considered cost-wise, you will get a small cost saving if you choose to go with conventionally-framed walls instead of opting for the SIP wall panels.
Using conventional lumber to frame out your timber frame or create a built-up roof system with foam certainly has its place and warrants discussion. There are other ways and techniques out there that I will not mention. The two that I see the most are the following:
Built-up
In a built-up roof system, one uses foam boards stacked on the roof around a 2x band board. You control the R-value of the roof by the thickness of the foam, similar to a SIP panel. You then attach 2x4s flat with long screws through the foam into the timber frame tying everything together. You will need to add lookouts to the gable and eaves to create all the overhangs; care should be taken here. All of that is then covered with your sheathing material and then underlayment. Please note that this is a vented roof system, whereas a SIP roof is unvented.
Framed
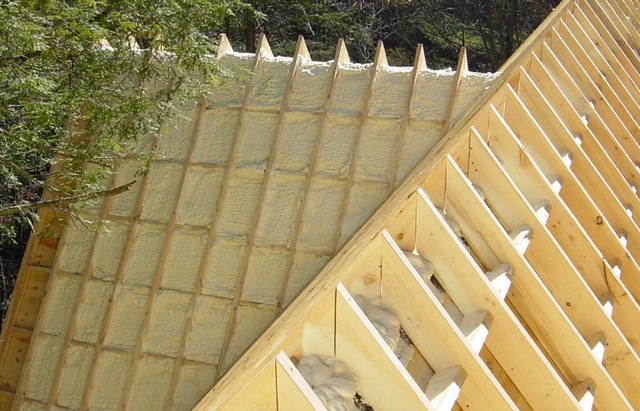
A framed system uses 2x material laid perpendicular to the timber frame roof system and then insulation is installed. Any type of insulation can be used from the high tech spray-in foam to fiberglass insulation. The denim jean factory waste insulation has always been an interesting solution. All that is finished with sheathing and the underlayment readied for the final roofing. Creating the overhangs is a bit easier with this method.
With either the built-up or the framed system you are basically creating a panel-like product, just in place and on site. To factor in the additional labor, time on the roof, delays for weather, speed and materials, I would really recommend that you consider the SIP solution for the roof over the timber frame. Integrating a SIP roof and conventionally framed roof is easy if planned out. Of course, the option to conventionally frame your walls around your timber frame and using SIPs over the roof is a great combination.
Brice, thanks for this post. What does a timber framer have to provide to a SIP panel and in what format (if any is standard) in order to get an SIP package back that will fit the timber frame perfectly? Thanks! Harold
Thanks for sharing this frame and insulation advice when building an enclosure. I had no idea that there were so many different types of insulation panels! However, if I had to choose one option, it would be the frames system with two layers of material so that I could use spray foam. I think that would be the best way to keep the enclosure well-insulated.
As a greenhorn to timber framing, a lot of things are perplexing that are never taught to those who learn the art of building such beautiful structures, and that is constructing the exterior walls and roofs. Oh sure, there are methods such as SIPs to eliminate a lot of the guess work, but for someone like me who doesn’t necessarily have the funds to go that route, a typical conventional stick wall / roof is the only option, but there is no real guide or examples of stick framing start to finish. Ideally, a video created by someone experienced in the field would be a great asset in showing newbies how to go about such a process.
I have completed my timber frame build, test fitted it, and now ready to bring to site to finish it off. The question begs, how do I go about it? I am flying by the seat of my pants and operating on a wing and a prayer methodology.
Lets get on the phone to discuss any specific questions that you have. There are some details that may help you at https://timberframehq.com/construction-details/conventional-framing/ . Having built and designed timber frames I personally recommend SIPs on the roof and stick framing on the walls. I certainly understand the cost factor in the SIP roof. If you are paying someone to build the built-up roof is more expensive than and SIP roof. Just too much labor involved. If you are doing it yourself the number flip. You can see how someone else built up their roof in the article. There is another way by framing out around the roof and build up insulation with blank foam sheets, laying down sleepers and sheathing it. The hard part comes with creating the overhangs.
Okay. I’ll try to give you a call at some point when I have some time. I’m in a hectic kind of situation right now trying to implement my plan of attack on trying to get my structure built. Thanks for the response Brice.
Hello Brice, thanks for all the info, just getting into your website and podcasts and am thankful for the resource. I’m in the process of designing a timber frame home and wanted to use ICF for basement walls and SIP’s for the timber frame walls. I have seen some examples of windows being installed directly in between the timbers for exterior walls and like the look, but are you recommending not to do that and have an SIP wall outside the frame and install the window in the SIP? Thanks for the clarification.
Dhayan
I do not recommend the infill system, instead, put the walls on the outside of the building. You can never really seal between the walls and the timbers for the long term and you will get air infiltration between the two. This will lead to a long term moisture problem and you will end up with premature rot.
Thank you, that makes a lot of sense.
Good morning Brice, I believe I will be doing a timber frame here in Florida this year. For a number of reasons I really want to use the infill technique on both interior and exterior walls for a number of reasons. For sure I will be utilizing dehumidification. I understand this is not recommended however, would a rigid foam layer of insulation for the exterior in conjunction with batts cavity insulation help with the moisture issue? I plan to nail plywood sheathing to the exterior timber and conventional frame, house wrap, rigid foam board, and cement board sheeting/battens as the finish look.
It will help quite a bit and is the solution most people come up with. I just find that the infill on an exterior wall takes more time and the final product is not as good. I understand the need for them and why they are a solution.
What about the remote wall and roof system?
Just doing some research on them, looks like a great solution. I need to look into this more.
Hi Brice, have been considering a plan (or perhaps a hybrid post and beam / stick framed garage apartment). Specifically I am thinking of the first story (garage portion) to be post and beam (8 by 8 posts, 8 by 12 beams) constructed. However, since ultimately.. it’s a garage.. I am trying to keep costs down without having to build another wall around the entire perimeter to sheath it. You mentioned above that:
“You can never really seal between the walls and the timbers for the long term and you will get air infiltration between the two. This will lead to a long term moisture problem and you will end up with premature rot.”
I also certainly don’t want that. So My thought was to use the zip R 3.6 system which is a house wrap, vapor barrier, and small amount of exterior insulation all in one. Kind of reminds me of an ultra thin SIP in a way.. And if I then offset this sheathing from the posts with a 5/8″ osb spacer (kind of like your stick built wall offset detail) I could come back after its sheathed and shoot a thin layer of closed cell foam around the backside of the posts between the sheathing. Where all of this meets the foundation on top of a pressure treated sill, I would use a fluid applied flashing product to finish the air sealing at the foundation. I know and certainly understand why you dont recommend the infill wall method for exterior walls, but with this kind of approach, do you still think air infiltration and rot would be an issue? Thanks!!
Tyler
Your method and built up wall system will help out, just remember those timbers will move and shrink with the seasons. So foaming and trying to seal it will fail over time. Sounds like you will be ok given it is a garage/secondary building.
Would the ZIP system be a good idea for a timber frame cabin with no interior insulation? SIPs scare me, in that they seem to lack modularity/repairability. I’m speaking from real world ignorance, though.
I’m new and trying to figure out the best way to insulate. My concerns are repairing, modifying, and also things like conduits, plumbing, etc.
Can you define what a zip system is?
How helpful that you mention how a built-up roof works and what it is used for. I am building a new home this year and helping the contractor with some parts. I will find a great timber supplier in the area for this.
Good luck with your project!
I’m planning on using Industrial Hemp as my wall material. It is in the form of Hempcrete, a mixture of Hemp Hurds and lime which hardens into a stone-like thermal mass wall which is also breathable. It is rendered with a lime plaster on the inside and the outside. There is no need for any added insulation, sheathing, cladding, tyvek or drywall. It is non-toxic, long lasting, fireproof, and provides thermal mass for heating and cooling efficiency. This can be created as panels with 2x framing that are placed between the structural timbers. They are created then craned into place and will include the window door frames. Hemp insulation panels in the roof and metal roof panels on top of the rafters. The slab requires thickened footers to hold the additional weight of the hempcrete panels. There is finally a supply chain and processing facilities in this industry — I’m involved in the industry and so I look forward to sharing this build with the TimberFrame community and adding HempCrete to the descriptions above to replace the toxic foam products. It makes sense to complement the natural beauty of the wood with a natural and healthy product for the walls. The prices will be coming down as supply of hemp increases, and its use becomes more popular and accessible. It’s about time! Would love to supply the TimberHQ customers with hempcrete and the know how of building with it.
Thank you for yourt comments- Hempcrete is intriguing!
I am still learning about timber framing and construction in general. I would be most interested in using natural insulation. Why can you not just put rockwool or any other insulation for that matter, like foam, between the posts with something like plywood keeping them there?
You can do that, I would not do a infill system but you can build a wrap and strap wall system and use natural insulation. On my office I used 2×6 exterior walls and have the blue jean insulation. Works great.