Transcript:
Learning how to light a timber frame house can certainly be a challenging aspect to the design of your home- however, as we look at these five proven steps you will not only be able to highlight your timber frame but make sure you don’t blow the budget doing so.
Many folks including the electrician may look at this task is a daunting project that we can easily ease your mind and that of your electrician in the next couple of minutes. So the first step is…
Step 1 – Planning
This is the pivotal stage in planning how to light your home. Working with your architect and designer to develop a thorough lighting plan is imperative. While I’m experienced in lighting design I always recommend that you visit a couple of electrical showrooms and talk with a professional lighting designer before finalizing your design. There are too many options out there for just one person to know them all.
Step 2 – Design
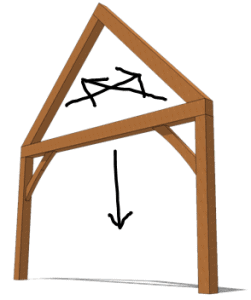
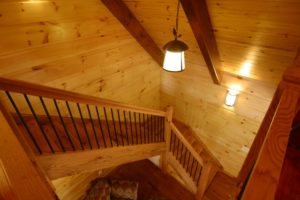
As a basic concept for lighting a timber frame great room or open area. The goal is to cross light the timber frame ceiling, so that the lights on the right point to the left of the center point of the ceiling and vice versa. This type of lighting pattern creates a glow that creates an incredible ambiance to the space below. Since many light fixtures are not able to be used in a timber frame, researching the various light fixtures out there this is a vital step beforehand.
Step 3 – Picking out the Light Fixtures
If you’ve decided to talk to a professional lighting designer then he or she has worked with you to choose the lighting fixtures for your timber frame home. However, if you’re like me I ended up with a stack of catalogs and thumbed through them until I found styles that I liked. I then got online and researched pricing and about two-thirds of the time the lighting supply store is cheaper and the other third the internet was cheaper. I would recommend sticking with the slightly higher cost and have the support and warranty that you will receive from going with the local lighting supply house, as long as they have experience with other timber frame structures.
Step 4 – Collaborating with the Timber Frame Company and Electrician
After you have developed both the timber frame plan and the lighting plan it is important to talk everything through with your timber frame company and your electrician, remember it is a team game building your house. They will all need to coordinate any chases and wiring considerations into their plans before they cut the timber frame and frame up the house. Talking
through this with the electricians before they get on site will both save you time, money and headaches in the long run.
Step 5 – Execution
While thorough planning is vital to a well-executed lighting plan for a timber frame home. Nothing trumps the actual execution of the plan. This is when all the hard work during the planning stage pays off. As long as everyone knows what is needed to hide the wires beforehand you can put light fixtures and switch boxes in the middle of timbers if need be.
Remember this is your project if you don’t feel like something is going right make sure you speak up and voice your opinion so that everyone on your team knows your concerns, so they can address them appropriately.
Those are the five steps in making sure you create a lighting plan for your timber frame that will not only illuminate your life but your timber frame home as well.


I can see this is something you can only visualize by looking at many timber homes and seeing how others have done it and learn from their mistakes and success’s…
It does take a bit of thought and imagination because each project is unique. I certainly have not learn everything about lighting and look forward to my future successes and mistakes.
I jumped into this without adequate planning for lighting. I wish I had read this beforehand. Now I need some serious advice about lighting my kitchen. The space is approximately 11′ X 11′ and is open to the dining room. It is an “L-shaped” kitchen. The ceiling and the floor are light brown (oiled white oak). I think that a minimum of 35 lumens/sq foot is recommended for kitchens.
My major problem is that this is timberframe construction and doesn’t allow enough space in the ceiling for can lights. I may be able to use trac or monorail lighting for general lighting, a can or a flush-mounted light behind a valence above the sink, and the hood lights above the range for task lighting. Any help in this dilemma will be greatly appreciated.
Do you have room to add a built up floor about the kitchen? If so there are some new LED low profile can lights that may work out for you. If not then there are some cool lights that hang from wires that look good and can provide you a lot of light. Also don’t forget to add some under cabinet lights and a stove hood with a bright light. Mine is not bright enough.
What light fixture did you end up using for cross-lighting?
Low voltage LED lighting works the best in this day in age. Back then we only had the standard tracklighting,